
Install & create your first project
GDDKit packages the application and .NET runtime together. Pick the release package that matches your operating system and processor, install or launch it, then create a local .gddkit project.
Choose the right package
| Platform | Released package | Notes |
|---|---|---|
| Windows 10/11 x64 | Setup EXE | Run the installer, then launch GDDKit from the Start menu. |
| Linux x64 | AppImage | Requires an X11 desktop plus GTK 3 and WebKitGTK 4.1-compatible runtime libraries. |
| macOS Apple Silicon | Signed and notarized PKG for osx-arm64 | Choose this for M-series Macs. |
| macOS Intel | Signed and notarized PKG for osx-x64 | Choose this for Intel-based Macs. |
There is no released Windows ARM/x86 or Linux ARM package in v2. Check the GDDKit website for the currently distributed downloads.
Install on Windows
Setup package
- Close an older GDDKit window if one is running.
- Open
GDDKit-win-Setup.exeand complete the installer. - Launch GDDKit from the Start menu.
- If you are upgrading from v1, read Move from v1 to v2 before editing your only copy of a project.
Install on macOS
- Download the package that matches Apple Silicon or Intel.
- Open the PKG and follow the installation steps.
- Launch GDDKit from Applications.
- If macOS blocks the first launch, confirm that the package came from the official GDDKit download and review the message in Privacy & Security before allowing it.
The repository does not publish a guaranteed minimum macOS version, so avoid assuming compatibility from the processor alone. If the application or preview does not start, include your macOS version and processor type in a feedback report.
Install on Linux
Make the AppImage executable, then launch it:
chmod +x GDDKit-linux-x64.AppImage./GDDKit-linux-x64.AppImageThe live preview uses WebKitGTK. Common runtime packages include:
# Debian / Ubuntu familysudo apt install libx11-6 libice6 libsm6 libfontconfig1 libgtk-3-0 libwebkit2gtk-4.1-0
# Fedora familysudo dnf install libX11 libICE libSM fontconfig gtk3 webkit2gtk4.1
Package names can differ by distribution. If the AppImage opens but the preview stays empty, start with the Linux preview checklist in Troubleshooting & FAQ.
Understand the home screen
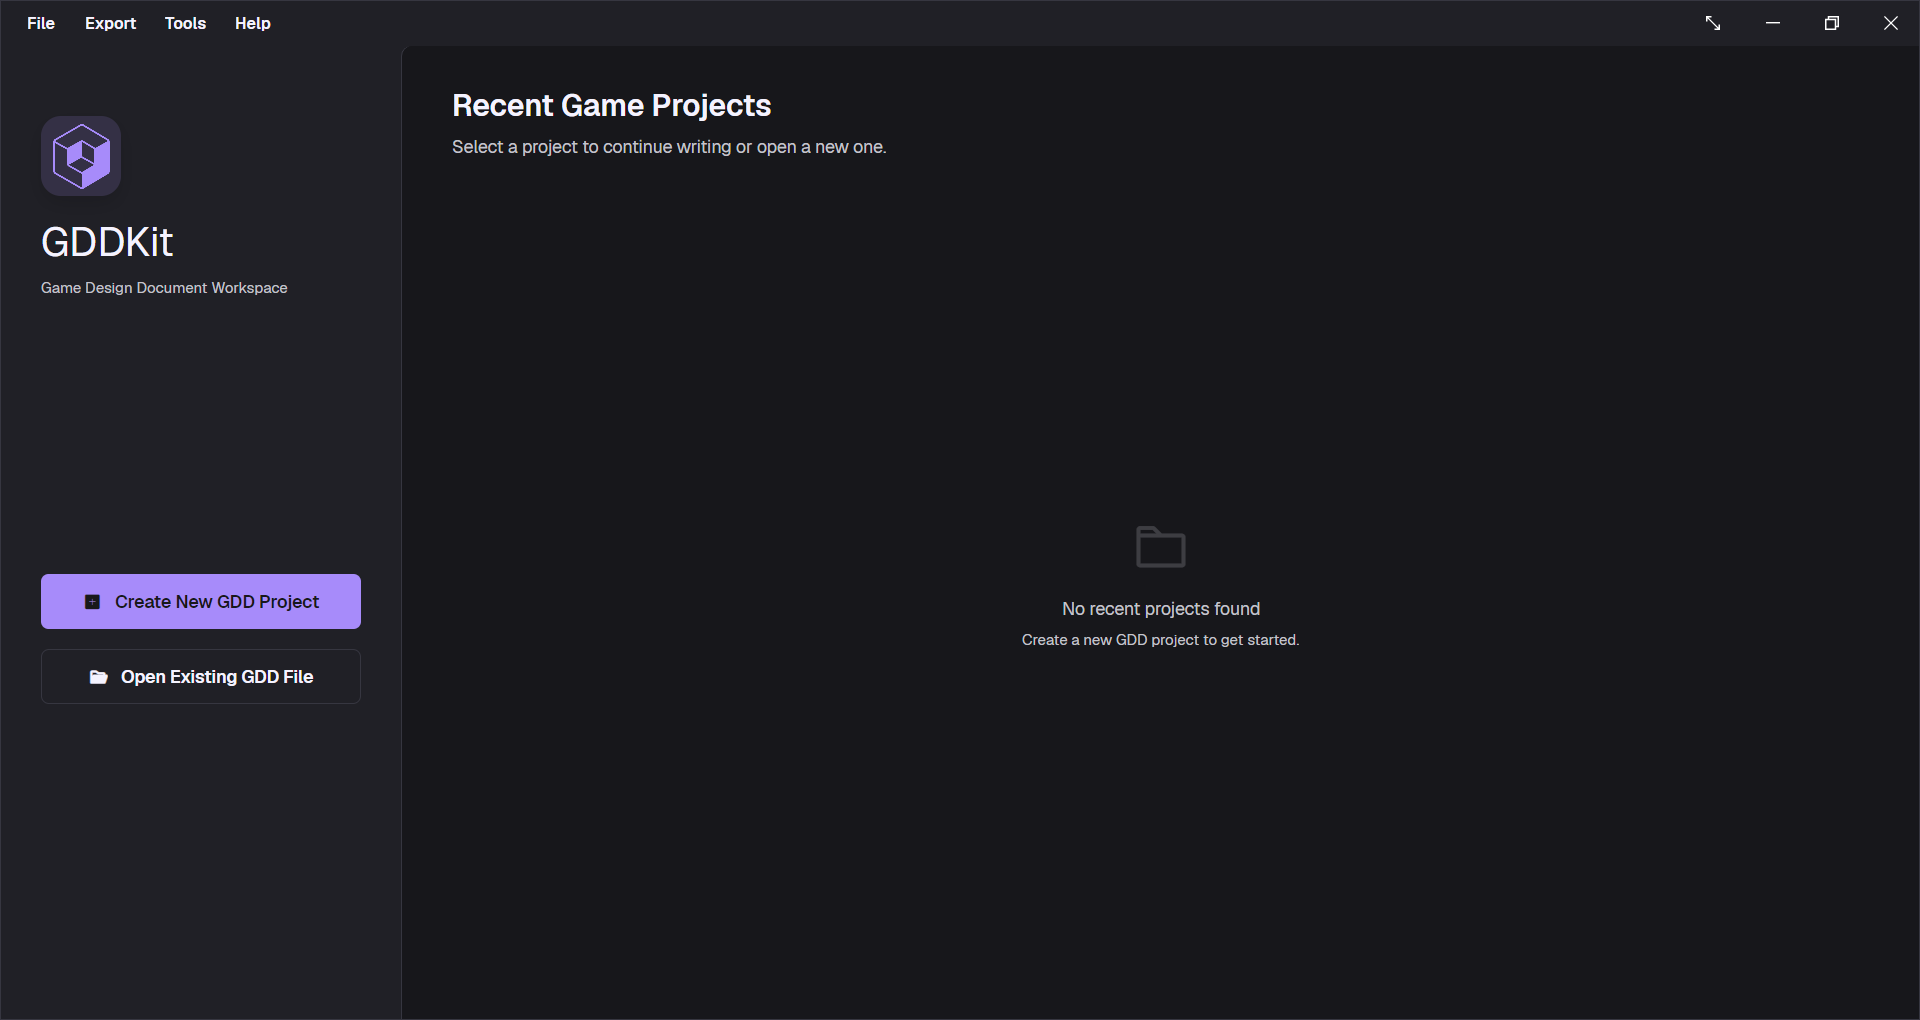
The home screen offers two primary actions and up to ten recent project cards:
Create New GDD Projectopens the project form.Open Existing GDD Fileselects an existing.gddkitfile.- A recent project card opens that file directly and shows its title, genres, file path, logo, and last-modified time.
Missing or unreadable recent files are omitted. If you moved a project, use Open Existing GDD File once from its new location to add the new path.
Create the project
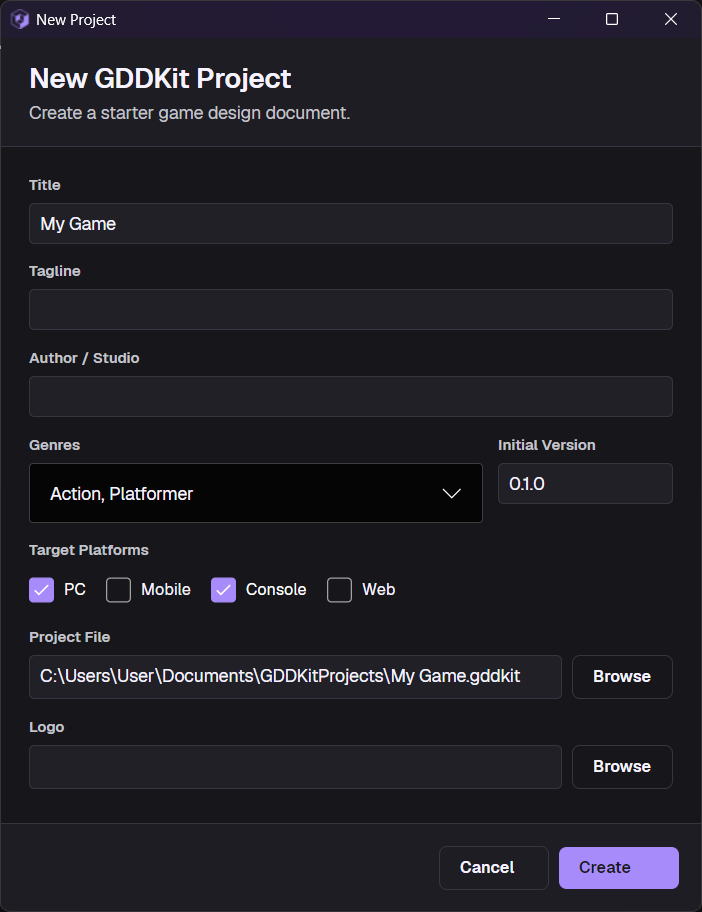
- Select
Create New GDD Project. - Enter a Project Title. This is the only required content field.
- Optionally add a tagline, author or studio, one or more genres, a starting version, and a project logo.
- Select any target platforms: PC, Mobile, Console, and Web. PC starts selected, but a project can have no platform selection.
- To choose a custom project location, use
Browsenext to the project file field. - Select
Create.
If a file with the generated name already exists, GDDKit adds a numeric suffix such as My Game 2.gddkit instead of overwriting it.
What GDDKit creates
The new project is saved immediately and opens with:
- 12 guided starter sections, from Overview and Core Loop through Scope and Milestones;
- a starter changelog entry for the project version;
- PC,
Other, and version0.1.0as defaults unless you changed them; - a readable JSON-based
.gddkitfile in the selected folder.
The default save folder is GDDKitProjects inside your Documents folder. Change it later under Tools → Workspace Settings.
Your first five minutes
- Open Overview and replace the sample prompts with a two-sentence pitch.
- Switch to Core Loop and edit its starter Mermaid flowchart.
- Press Ctrl + S to save.
- Press Ctrl + E to cycle Edit → Preview → Split.
- Open
Export→Export GDD to PDF…and create a test PDF.
Next, read the Workspace tour and Files, assets & backups before moving the project to another computer.